
The Swap Feature
In this article we show how to use the Swap feature of the exchange powered by our partner Changenow.
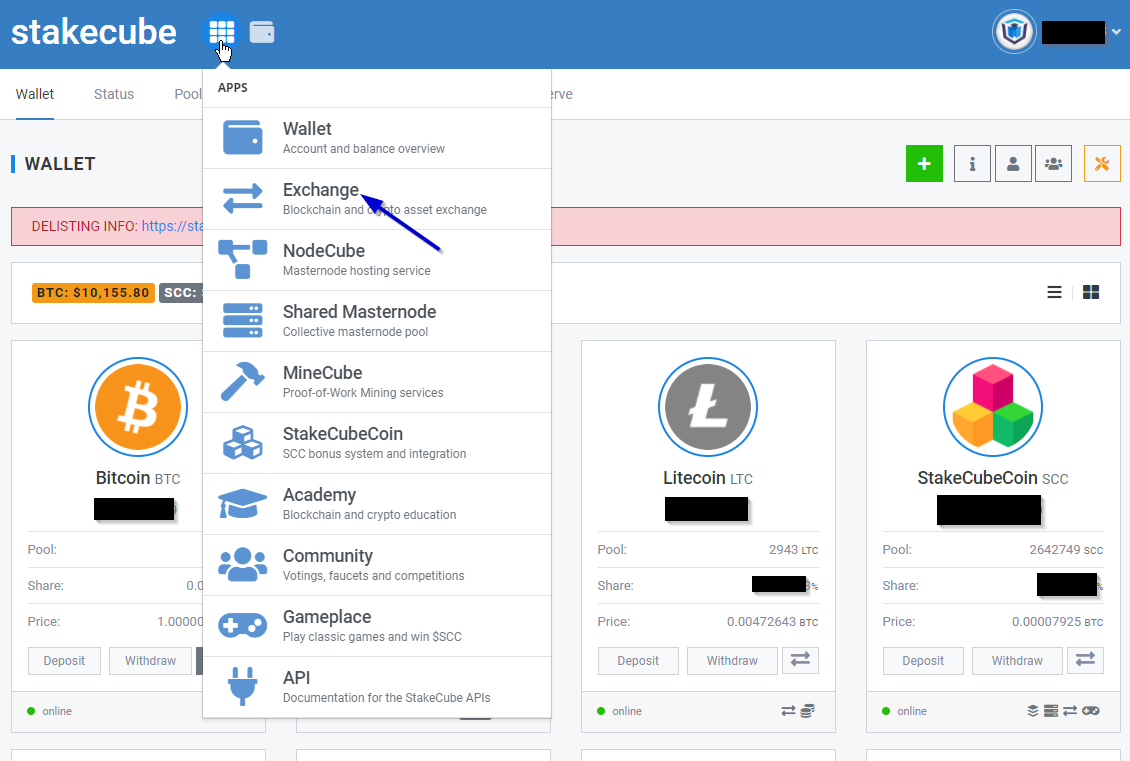
To access it, click on the “Apps” button from the StakeCube main page. You will find it after selecting “Exchange” from the drop-down menu at the top.
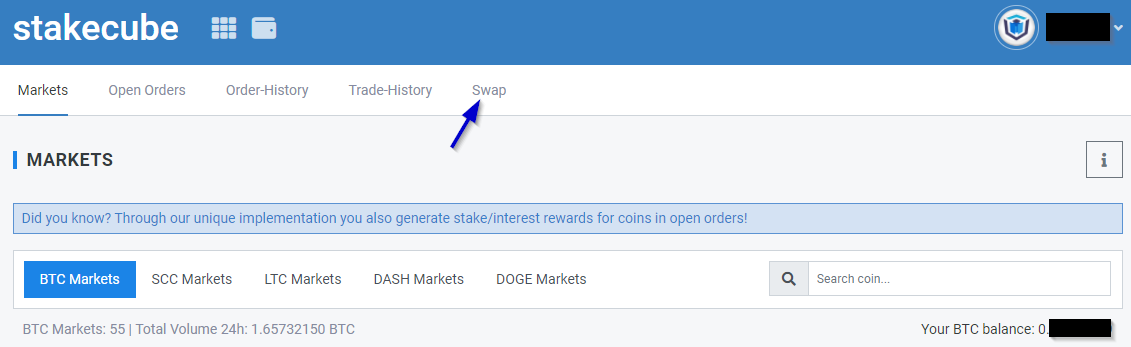
This will take you to the Exchange page. Once you’re there, choose the “Swap” tab from the top.
This feature allows you to swap coins that are not supported by StakeCube for others that are. For example, let’s say you have TRX on your own wallet and want to swap it for Bitcoin to earn interest on StakeCube. Instead of having to send the coins to an exchange, sell them and then send the Bitcoin to StakeCube, you can simply use the Swap feature.
It can also be used to swap coins supported by StakeCube for others that are also supported. It is possible that the quote offered for the swap LTC to DASH, LTC to BTC etc… is better than the one you’d get on the exchange. In those cases the Swap feature will save you money.
Let’s see how to use it.
Performing a Swap
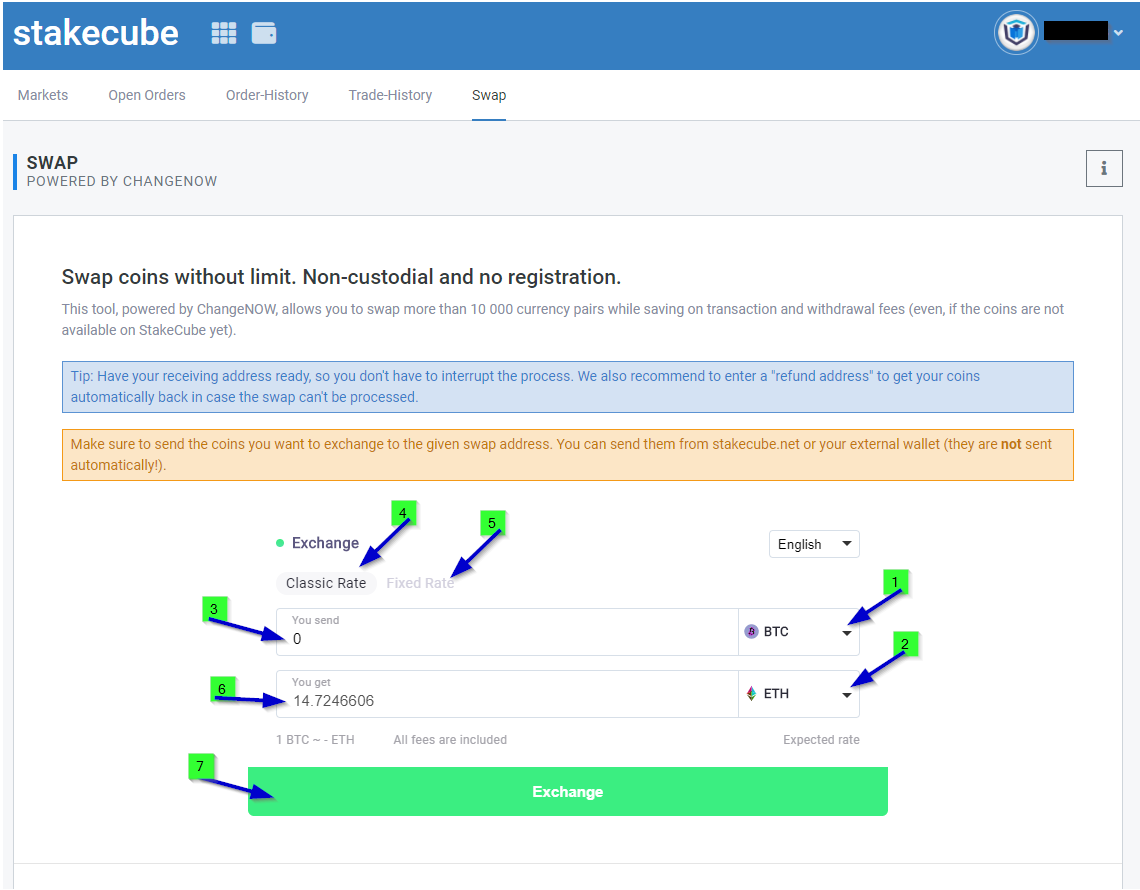
On the Swap tab, you’ll have to fill out some values and select a few other things. Let’s go one by one.
(1) Select the coin you want to swap.
(2) Select the coin you want to receive in exchange for the coin selected in 1.
(3) Select the amount you want to send for swapping.
Then you need to choose the kind of exchange rate you want to swap for. There are two options: Classic Rate and Fixed Rate. Classic Rate will be selected by default.
(4) Classic Rate: will try to perform the swap at the displayed rate but it might suffer price differences during the operation.
(5) Fixed Rate: the swap price is fixed, and won’t change during the swap, this will offer you lower rates in exchange for the extra safety.
(6) After you have finished filling out the form, it will display here the amount that you will receive after the swap.
(7) Once you are sure everything is correct, press this button to begin the swap. The following box will appear.
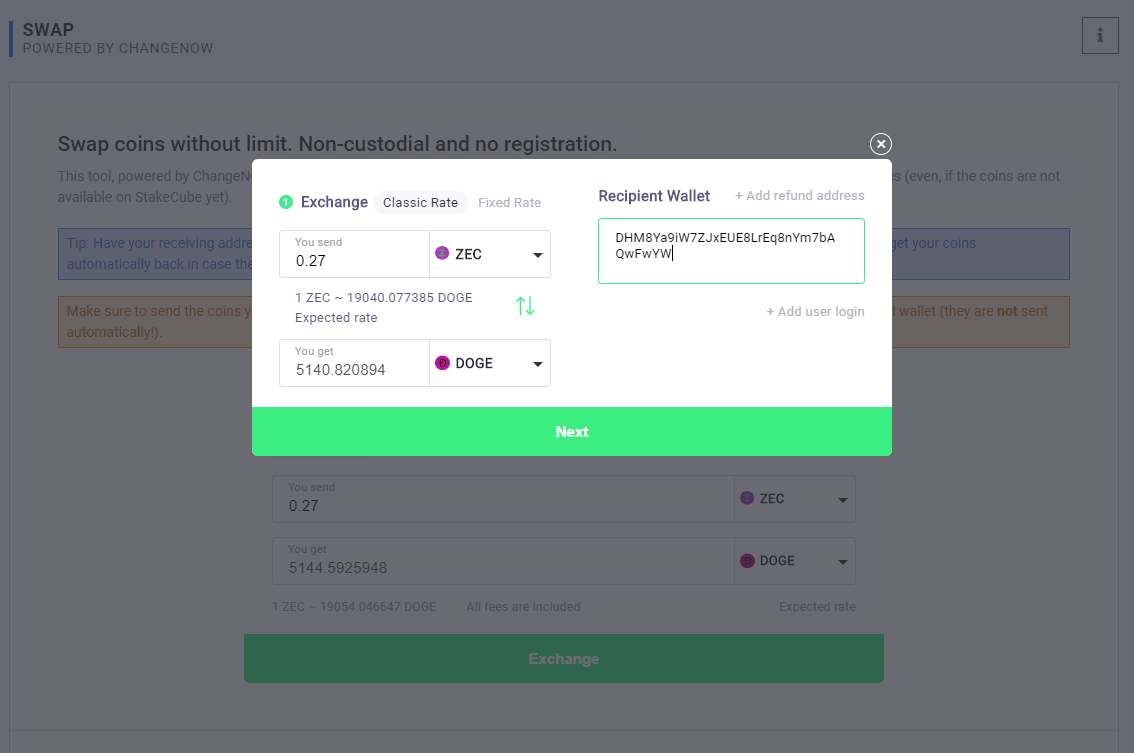
Check your data to verify they are correct, with quantity to swap, coin and amounts. Here you will have to input the receiving address. Coins will be sent to you to this address after the swap. In the example we are swapping ZEC for DOGE, so we need to specify our DOGE address to receive the DOGE after the swap.
Once you fill out the address, press ‘Next‘. The following confirmation box will appear:
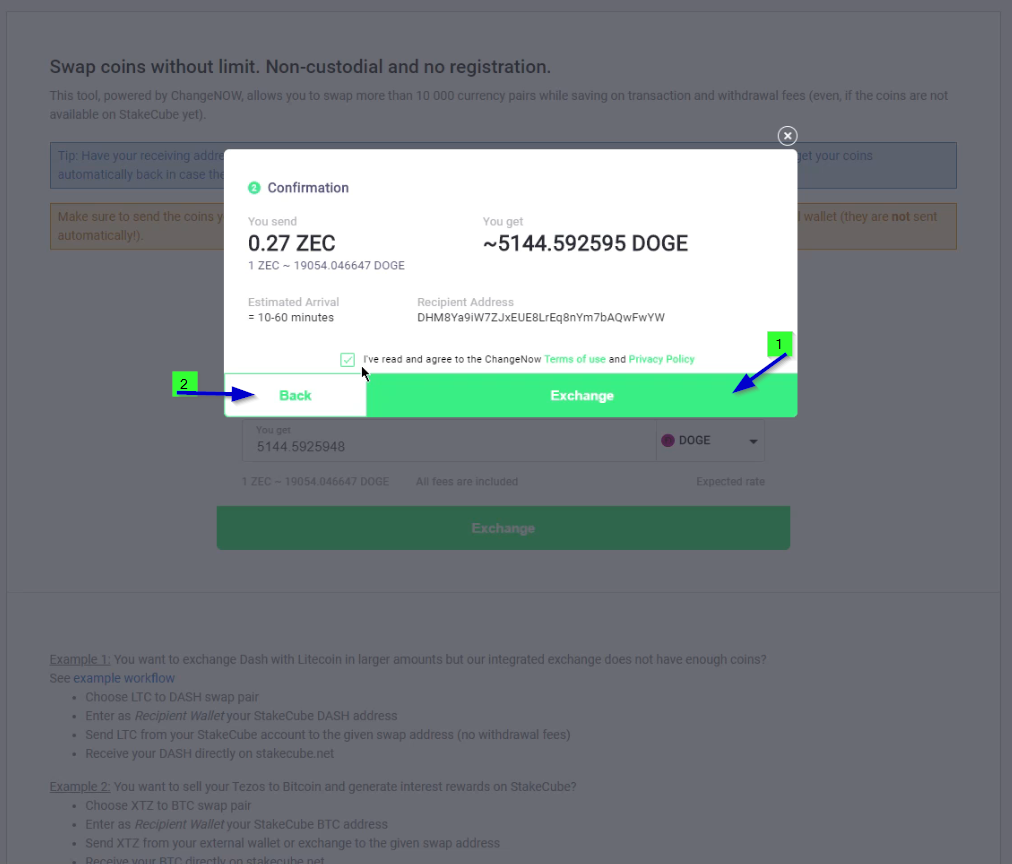
Check again that all information is correct, and press “Exchange” (1) to confirm, or if you want to change something press ‘Back’ (2). Here you will see an estimate of how long the transaction will take. Generally this is correct, but occasionally it takes a little longer.
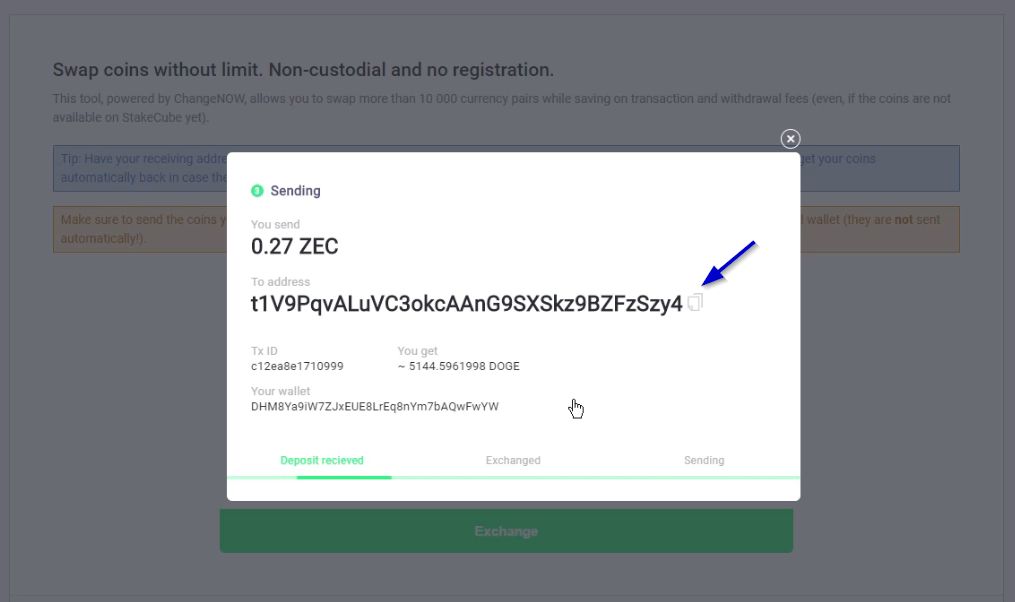
A box will pop up, containing the address where you need to send the coins you want to swap. For our example, we will be sending ZEC to that address.
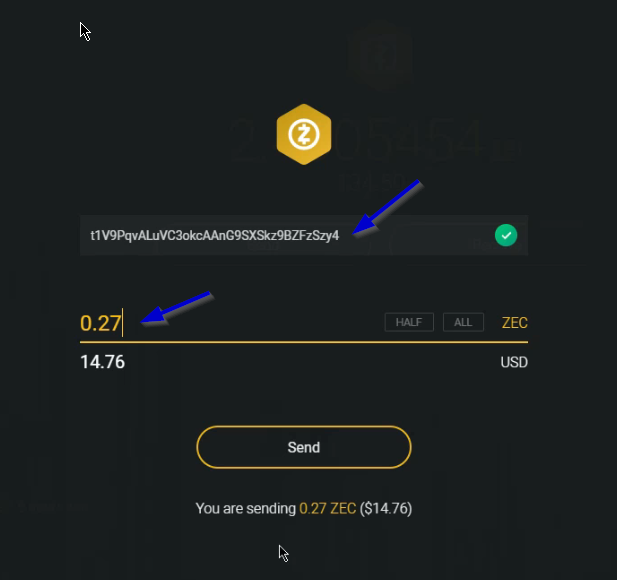
Copy the address shown, go to your wallet and send the correct amount to that address.
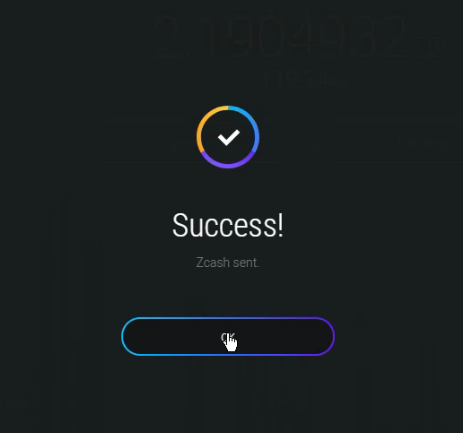
After sending the coins, you will have to wait for the transaction to complete.
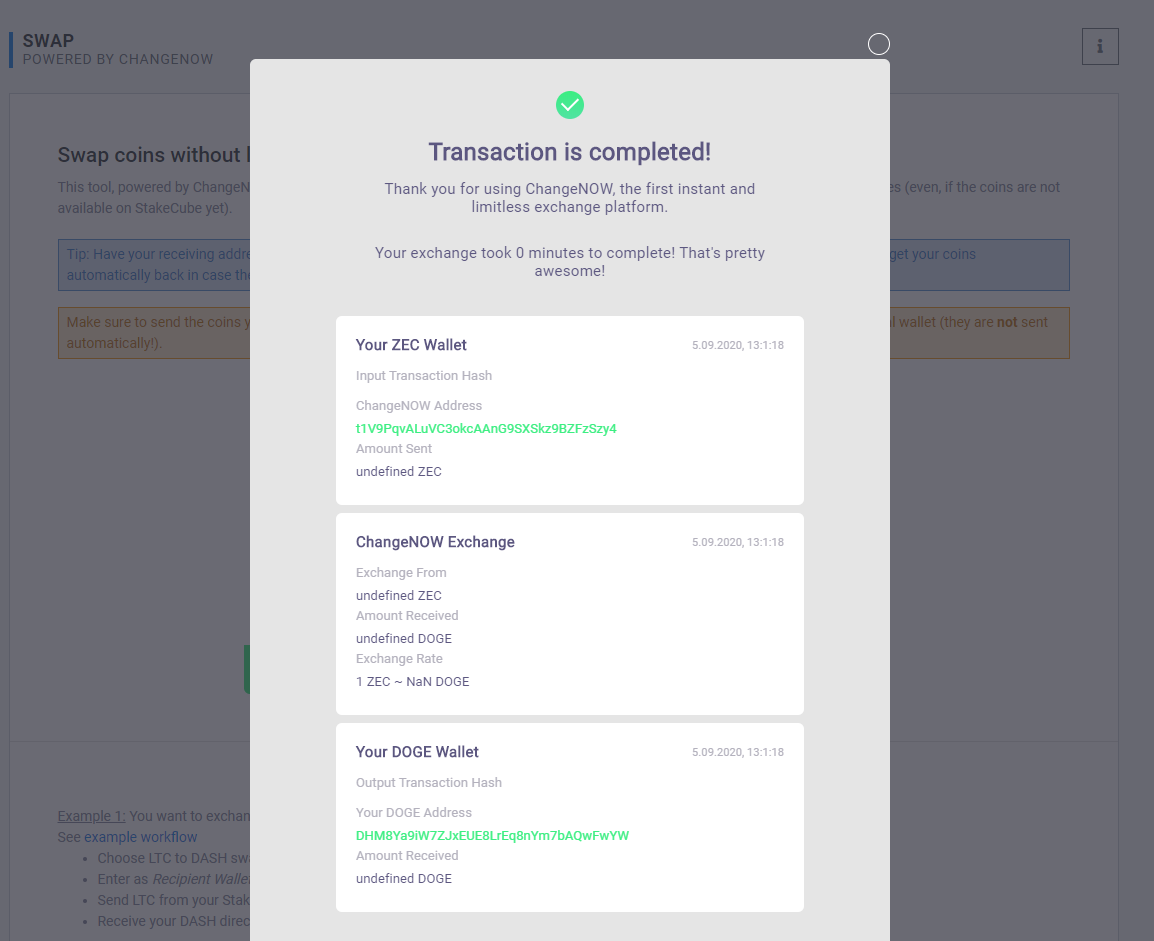
Once the minimum network confirmations has been reached, the coins will be in your wallet.