
Registering your SCC Masternode for the Bonus Program
In this article we will guide you through the necessary steps to register your SCC masternode for the bonus program. All SCC masternodes can be registered this way, including those hosted with the Hot Node version of NodeCube. The only difference is the way to obtain the required data.
Let us see first where to find the address and signature necessary to register a masternode. This will be different depending on the way you chose to host your masternode.
With NodeCube Cold Node or on VPS.
If you are using NodeCube or a third party hosting provider, the steps are the same as when you have your masternodes hosted on a VPS.
First open your StakeCube Coin desktop wallet and let it fully synchronize.
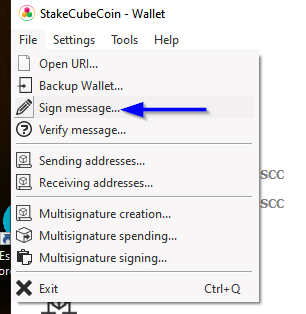
Click on the “file” drop-down menu and choose “Sign message”.
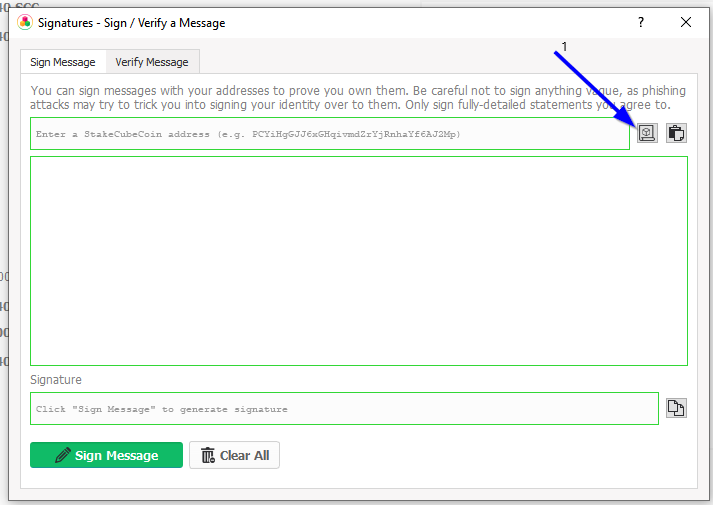
On the window that pops up, click on the highlighted button (1).
Find in the list the receiving address corresponding to your masternode.
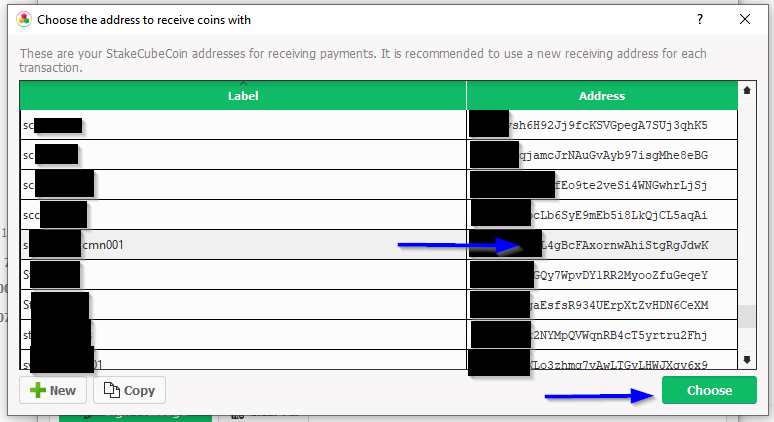
Select it, and press the “Choose” button on the bottom-right corner. A new window will pop up that allows you to sign your message. It will show the address you selected (1). Press “Sign Message” (2) to display the signature (3).
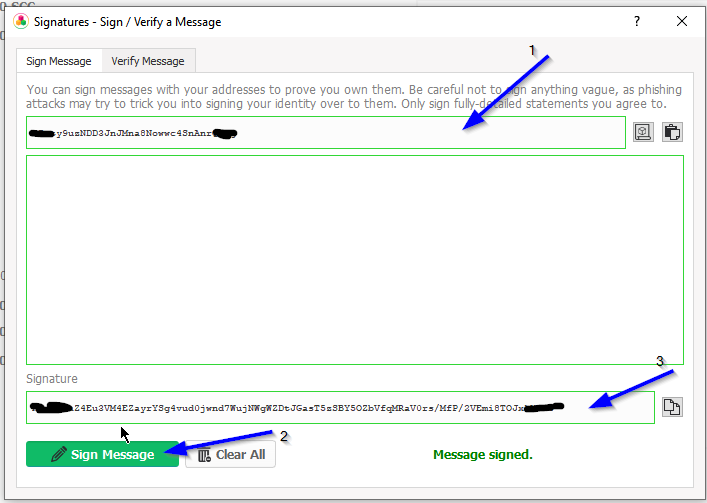
With this address and signature you can already register your masternode.
With NodeCube’s Hot Node
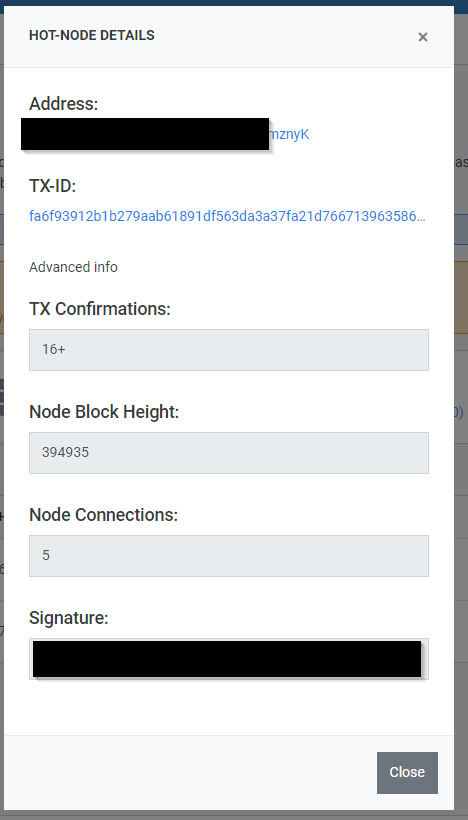
Use the drop-down menu at the top of the site to navigate to the NodeCube page. Go to the Hot Node tab to find your masternode, and click on the “i” button. To display the full information and obtain the signature you will have to click on “Advanced info”

Using the Signature and Address to Register your Masternode
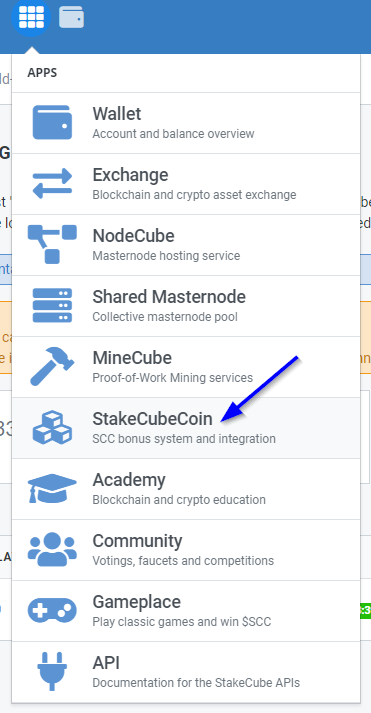
Now that you have the necessary data, go to the drop-down menu at the top of the page on StakeCube and select the StakeCubeCoin option.
You should see the following screen:
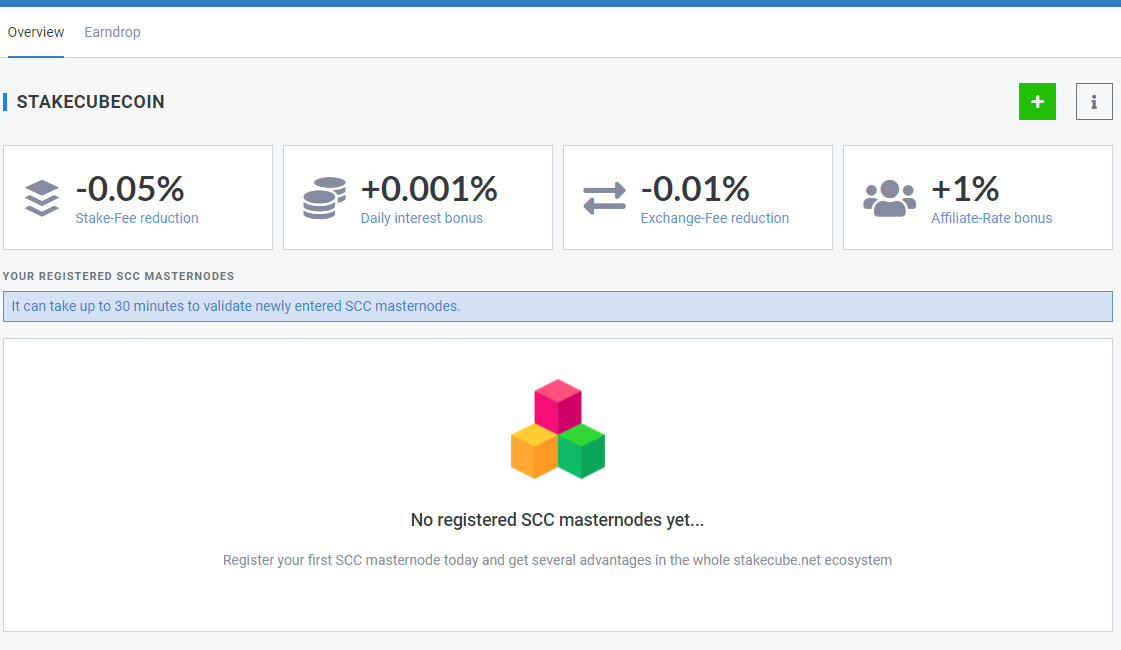
Click on the “+” button, and paste the address and signature that you generated in the previous steps on the corresponding fields. Paste the address to the “Masternode-Public-Address:” field (1) and the signature to the “Signature” field.
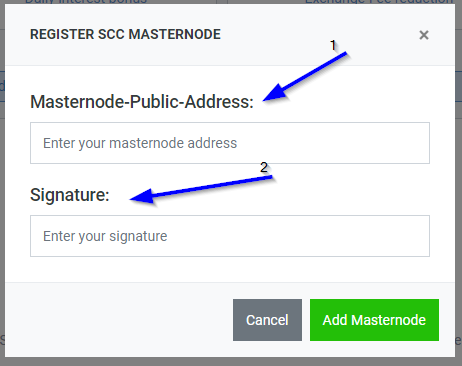
Click now on “Add Masternode“. This will add your Masternode to the validation queue.
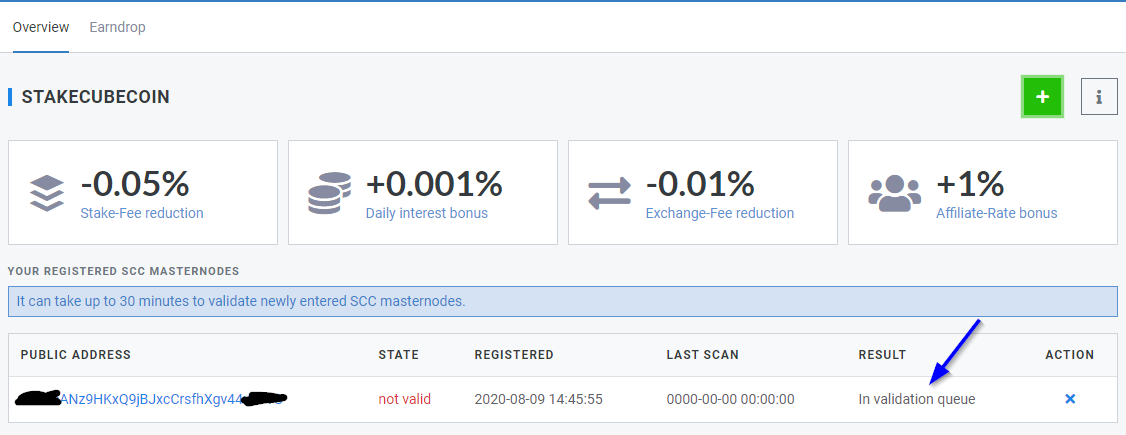
Validation might take up to 30 minutes, sometimes more if many users are trying to validate their Masternodes. Simply wait until the state changes to “valid“.
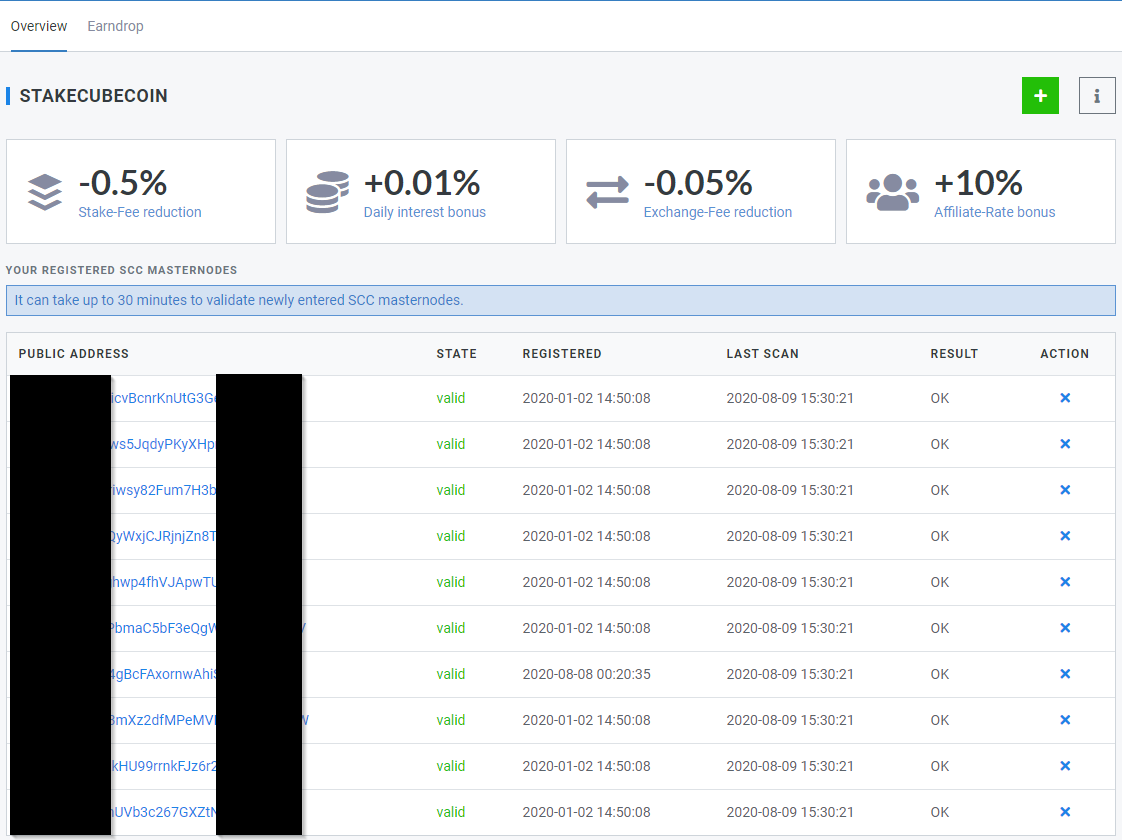
Congratulations! Your masternode is now registered and you will now receive the bonuses that it entitles you to.